
When we closed last time the box of my soprano ukulele was just getting glued together. Once the box was complete, it was time to prepare to install the binding. This amounts to trimming down any overhanging wood from the top and the back. After gluing the separate pieces together, there is always some amount of excess wood to remove. Imagine a guitar shaped cookie cutter passing through a larger piece of rolled out cookie dough wood. The trimmings of dough are cut off by the cutter. With a guitar, the builder has to remove that wood with a knife or files or whatever else will work.
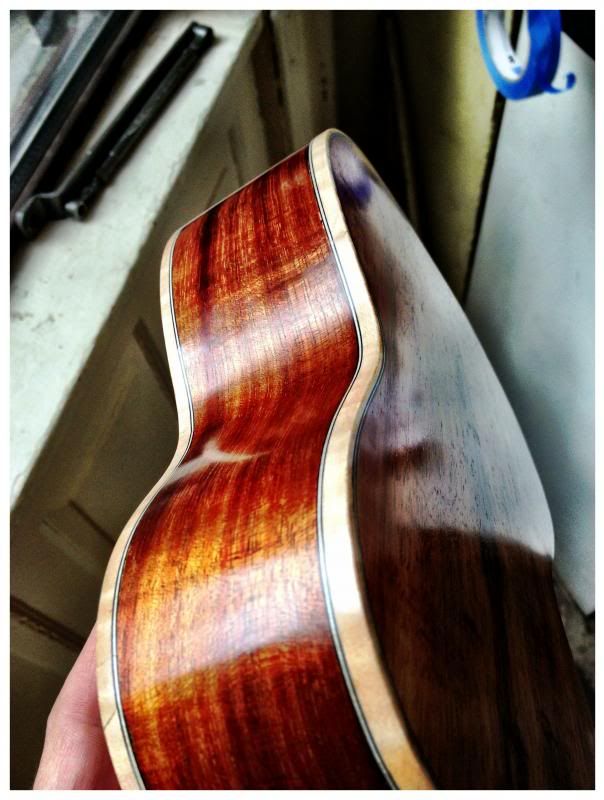 Binding installation complete! This is the destination. My road there was bumpy. Read on...
My intent is to bind the free edges of this instrument. Binding is basically a thin ribbon of material (plastic, wood, whatever...) that is laid into a pre-cut "shelf" of equal size in a negative space. In the world of guitars and similar instruments, binding is known by certain folks as a thing that is difficult to do well; That is, without obvious ugliness, gaps, defects or eruptions. It is a sign of luxury and extra attention heaped upon a creation.
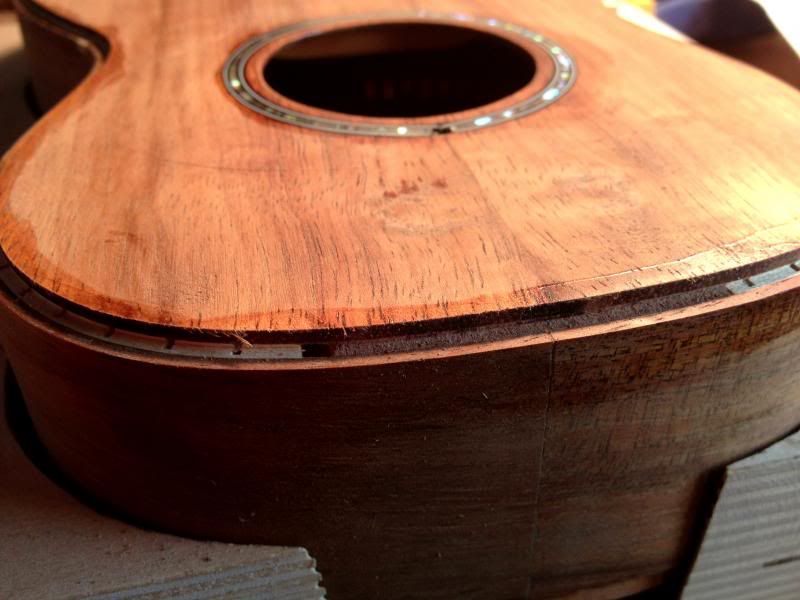 Even the most complex binding scheme starts with a single cut. For multiple pieces, you gotta perform the cuts for each individual piece in the proper order to minimize chipping and grain tear out. The "shelf" looks huge but this uke is tiny, so it's just a camera trick. What you are seeing is actually only about 1/16th-inch deep.
After trimming the overhanging edges of the top and back down to less than 1mm by hand, I will flush trim any remaining overhang with a power tool. This is done because the best way to avoid chipping and tear-out when cutting the binding channels is to be making the smallest cut necessary to accommodate the total size of the binding strip.
 The Binding Router Kit from Stew-Mac includes these bearings that control the depth of cut of the bit. I want to mention that the first shipment included a redundant bearing and was missing the next size up. This was a problem because THAT was the one I needed at the moment. I mention this not because of the mistake, but because of the immediate response of Stewart-MacDonald customer service. In two days the replacement bearing was in my mailbox. They are human and mistakes get made. And they make it right, with haste, every time. Bravos!
The flush-cut trimming process gave me my first opportunity to deploy the binding router bit and depth control bearing set provided for review by Stewart-MacDonald. This tool set gives the builder a great head start in routing a proper binding channel for any custom or standard binding design. The cornerstone of the kit is the router bit with the removable/interchangeable bottom bearing.
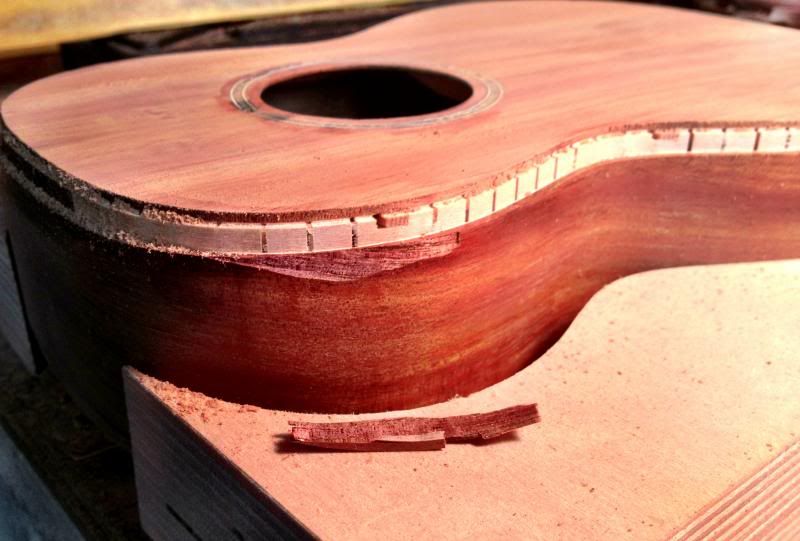
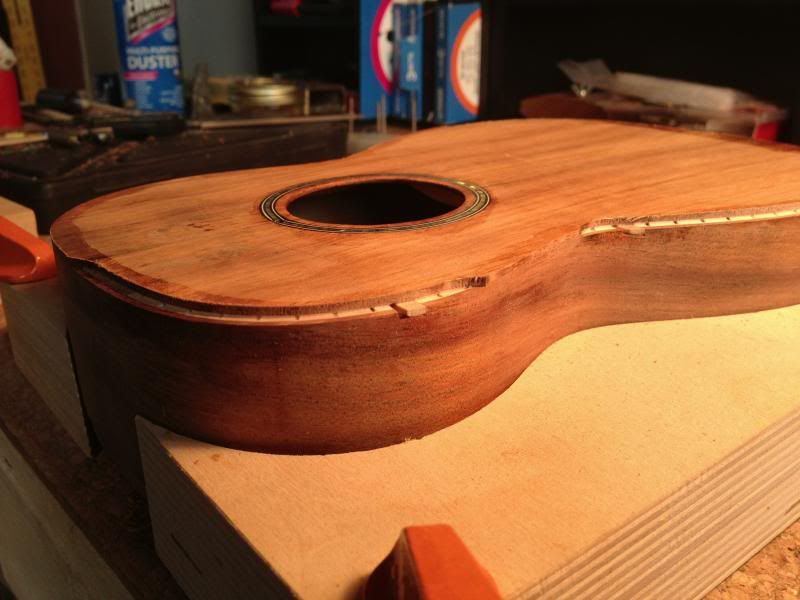 This shows the very first cuts, and the top bracing peeking through the kerfing. Covering the ends of the braces is the practical reason for adding the binding. The outside curves are prone to tearing out due to grain orientation and the directional rotation of the cutting edge of the bit. By performing a "climb cut" in these areas, you reduce your chances of making a mess of things. A climb cut reverses the direction of travel of the cutter. You cut the tricky bits in reverse and then make a full pass in the correct direction to complete the cut.
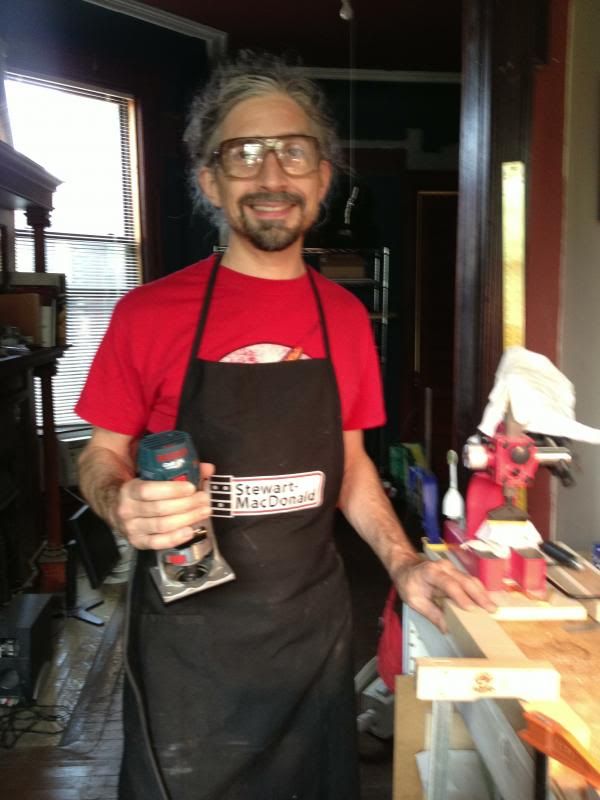
The kit contains 19 different sized bearings that produce cut depths including flush and a range from 0.040-inches up to 0.210-inches in steps of hundredths of an inch. By adjusting the blade length and the cutting depth, a builder is able to create binding designs from simple to complex.. A palm-sized, "laminate trimmer" is the preferred driver for the bit. I know quite a few folks that like the Bosch Colt. The bearings are very accurately sized as checked with my digital caliper. Consistent to +/- 0.001-inch, the bearings definitely fall within the tolerances I require in my work. Thanks Stew-Mac for making this great kit available!
Like I said, this tool gives the user a head start but there is no guarantee of a smashing success. Setting up the tool for the right cut is a long way from executing the right cut. I got a number of very firm reminders of this concept. Like this for instance.
 Ouch! It just jumped right out of there. Even due diligence does not prevent things like this. Every piece of wood is different and these sort of surprises will always happen. You just get better at hiding them, hopefully.
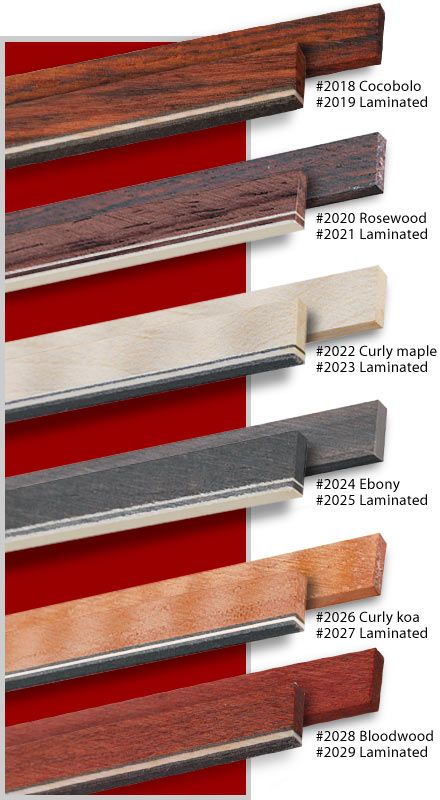
After routing the channels for the binding, it's time for some wood bending. My figured maple binding comes in straight lengths of almost three feet and 0.080-inches thick. Plastic binding is generally pretty flexible, but not the wooden variety. Heat and moisture are used to create steam and this gives the wood a bit of temporary flex. A bending form can be combined with a heat blanket for a very accurate bend, if you have the proper equipment. Otherwise a simple cylinder shaped iron and a great deal of patience can be used with success. This was my method and yes, my patience duly tried.
Figured wood is very difficult to bend. Cracking at the points where ribbons of figure intersect is extremely challenging to avoid. In fact, avoiding cracking was an elusive goal. Instead I had the opportunity to glue and attempt to hide a dozen or so breaks in my binding.
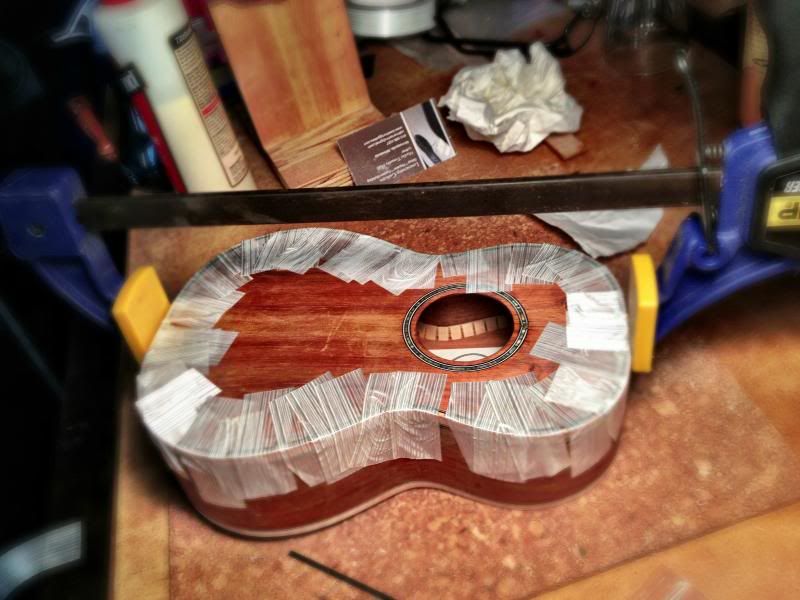
Gluing in the binding involves working inch by inch around the piece. With glue in the channel, one hand presses the binding into the curve while the other hand adds a strip of tape as a clamp. One must work as quickly and cleanly as possible. Any glue squeeze-out has to be cleaned up sooner or later. Sooner is easier. Once a side is all glued and clamped, it's smart to add an additional clamp to keep the ends down
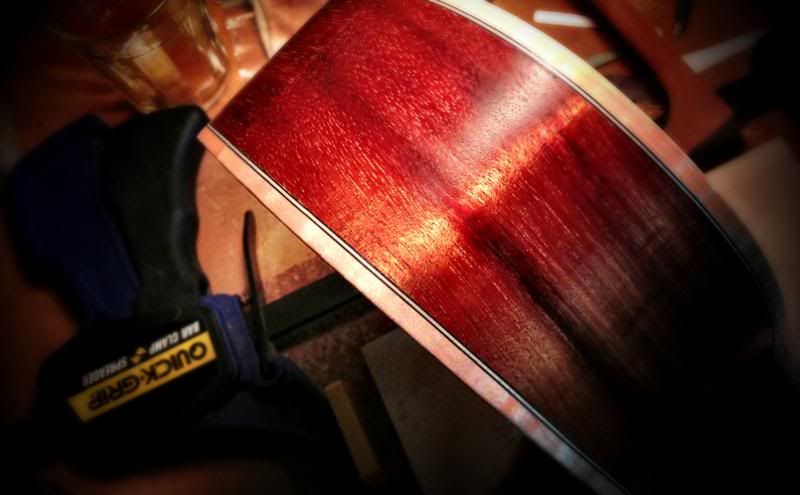
Once there was a build of shiny finish on that gorgeous wood, there was no point in noticing a few minor flaws amongst so much YUM. Before adding the finish though, there's a good amount of additional finesse required in the mix. We'll talk about that next time and take a look at another great tool from the Stew-Mac catalog, the StewMac Ultimate Scrapper.
 Binding installation complete! This is the destination. My road there was bumpy. Read on...
My intent is to bind the free edges of this instrument. Binding is basically a thin ribbon of material (plastic, wood, whatever...) that is laid into a pre-cut "shelf" of equal size in a negative space. In the world of guitars and similar instruments, binding is known by certain folks as a thing that is difficult to do well; That is, without obvious ugliness, gaps, defects or eruptions. It is a sign of luxury and extra attention heaped upon a creation.
 Even the most complex binding scheme starts with a single cut. For multiple pieces, you gotta perform the cuts for each individual piece in the proper order to minimize chipping and grain tear out. The "shelf" looks huge but this uke is tiny, so it's just a camera trick. What you are seeing is actually only about 1/16th-inch deep.
After trimming the overhanging edges of the top and back down to less than 1mm by hand, I will flush trim any remaining overhang with a power tool. This is done because the best way to avoid chipping and tear-out when cutting the binding channels is to be making the smallest cut necessary to accommodate the total size of the binding strip.
 The Binding Router Kit from Stew-Mac includes these bearings that control the depth of cut of the bit. I want to mention that the first shipment included a redundant bearing and was missing the next size up. This was a problem because THAT was the one I needed at the moment. I mention this not because of the mistake, but because of the immediate response of Stewart-MacDonald customer service. In two days the replacement bearing was in my mailbox. They are human and mistakes get made. And they make it right, with haste, every time. Bravos!
The flush-cut trimming process gave me my first opportunity to deploy the binding router bit and depth control bearing set provided for review by Stewart-MacDonald. This tool set gives the builder a great head start in routing a proper binding channel for any custom or standard binding design. The cornerstone of the kit is the router bit with the removable/interchangeable bottom bearing.
 This shows the very first cuts, and the top bracing peeking through the kerfing. Covering the ends of the braces is the practical reason for adding the binding. The outside curves are prone to tearing out due to grain orientation and the directional rotation of the cutting edge of the bit. By performing a "climb cut" in these areas, you reduce your chances of making a mess of things. A climb cut reverses the direction of travel of the cutter. You cut the tricky bits in reverse and then make a full pass in the correct direction to complete the cut.
 The kit contains 19 different sized bearings that produce cut depths including flush and a range from 0.040-inches up to 0.210-inches in steps of hundredths of an inch. By adjusting the blade length and the cutting depth, a builder is able to create binding designs from simple to complex.. A palm-sized, "laminate trimmer" is the preferred driver for the bit. I know quite a few folks that like the Bosch Colt. The bearings are very accurately sized as checked with my digital caliper. Consistent to +/- 0.001-inch, the bearings definitely fall within the tolerances I require in my work. Thanks Stew-Mac for making this great kit available!

Like I said, this tool gives the user a head start but there is no guarantee of a smashing success. Setting up the tool for the right cut is a long way from executing the right cut. I got a number of very firm reminders of this concept. Like this for instance.
 Ouch! It just jumped right out of there. Even due diligence does not prevent things like this. Every piece of wood is different and these sort of surprises will always happen. You just get better at hiding them, hopefully.
After routing the channels for the binding, it's time for some wood bending. My figured maple binding comes in straight lengths of almost three feet and 0.080-inches thick. Plastic binding is generally pretty flexible, but not the wooden variety. Heat and moisture are used to create steam and this gives the wood a bit of temporary flex. A bending form can be combined with a heat blanket for a very accurate bend, if you have the proper equipment. Otherwise a simple cylinder shaped iron and a great deal of patience can be used with success. This was my method and yes, my patience duly tried.
Figured wood is very difficult to bend. Cracking at the points where ribbons of figure intersect is extremely challenging to avoid. In fact, avoiding cracking was an elusive goal. Instead I had the opportunity to glue and attempt to hide a dozen or so breaks in my binding.
Gluing in the binding involves working inch by inch around the piece. With glue in the channel, one hand presses the binding into the curve while the other hand adds a strip of tape as a clamp. One must work as quickly and cleanly as possible. Any glue squeeze-out has to be cleaned up sooner or later. Sooner is easier. Once a side is all glued and clamped, it's smart to add an additional clamp to keep the ends down


Once there was a build of shiny finish on that gorgeous wood, there was no point in noticing a few minor flaws amongst so much YUM. Before adding the finish though, there's a good amount of additional finesse required in the mix. We'll talk about that next time and take a look at another great tool from the Stew-Mac catalog, the StewMac Ultimate Scrapper.
No comments:
Post a Comment