
For the longest time, I haven't had much to write about concerning building guitars. Life got complicated and I got busy and in the process, became disconnected from my goals. And from my happiness. And that became a problem. Luckily, my shrink quickly helped me realize that, as a creative person, I need to create. And so...
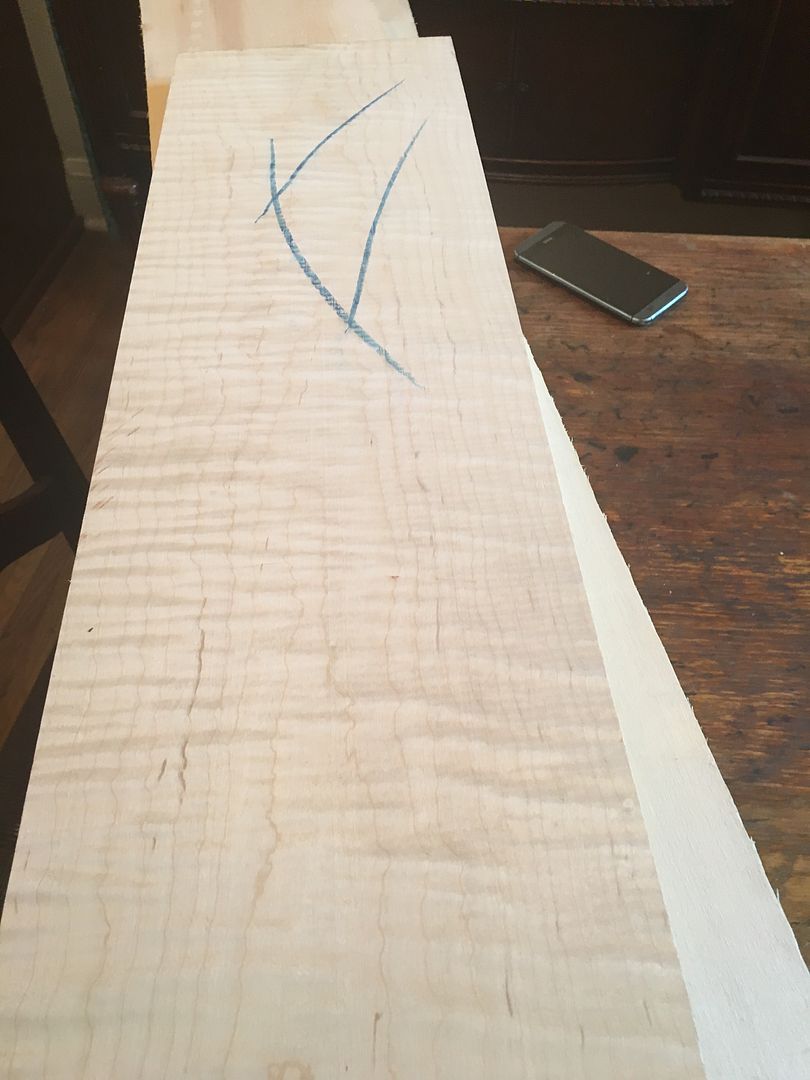
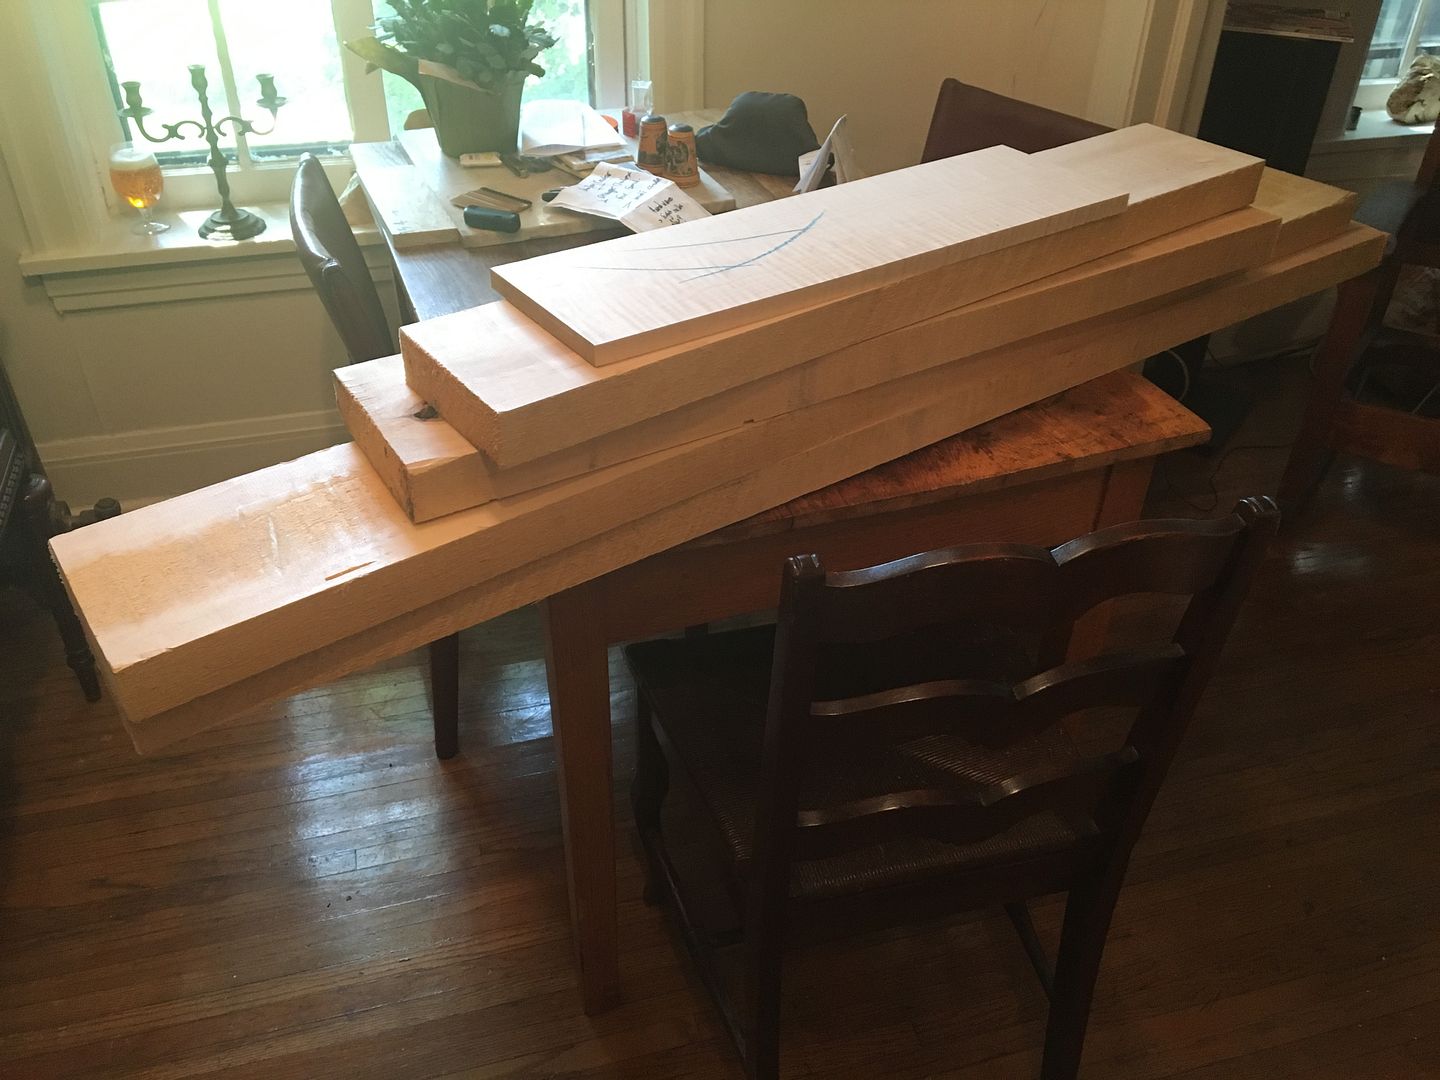 This is a pile of lumber that I picked up from a local favorite, Youngblood Lumber in NE Minneapolis. If you shop for "Guitar Wood" online, you will typically find individual pieces of lumber that are cut to size for the specific need, such as necks, electric bodies and so on. Typically, electric guitar bodies are made up of at least two joined pieces of wood and they are sold ready to go, and prices start around $50. But if you are willing to make a little sawdust and do some gluing, you can save a ton of cash! This stack, plus the following hunk of flamed maple cost me $60. That's enough wood for five guitars, one with a very nice looking curly top.
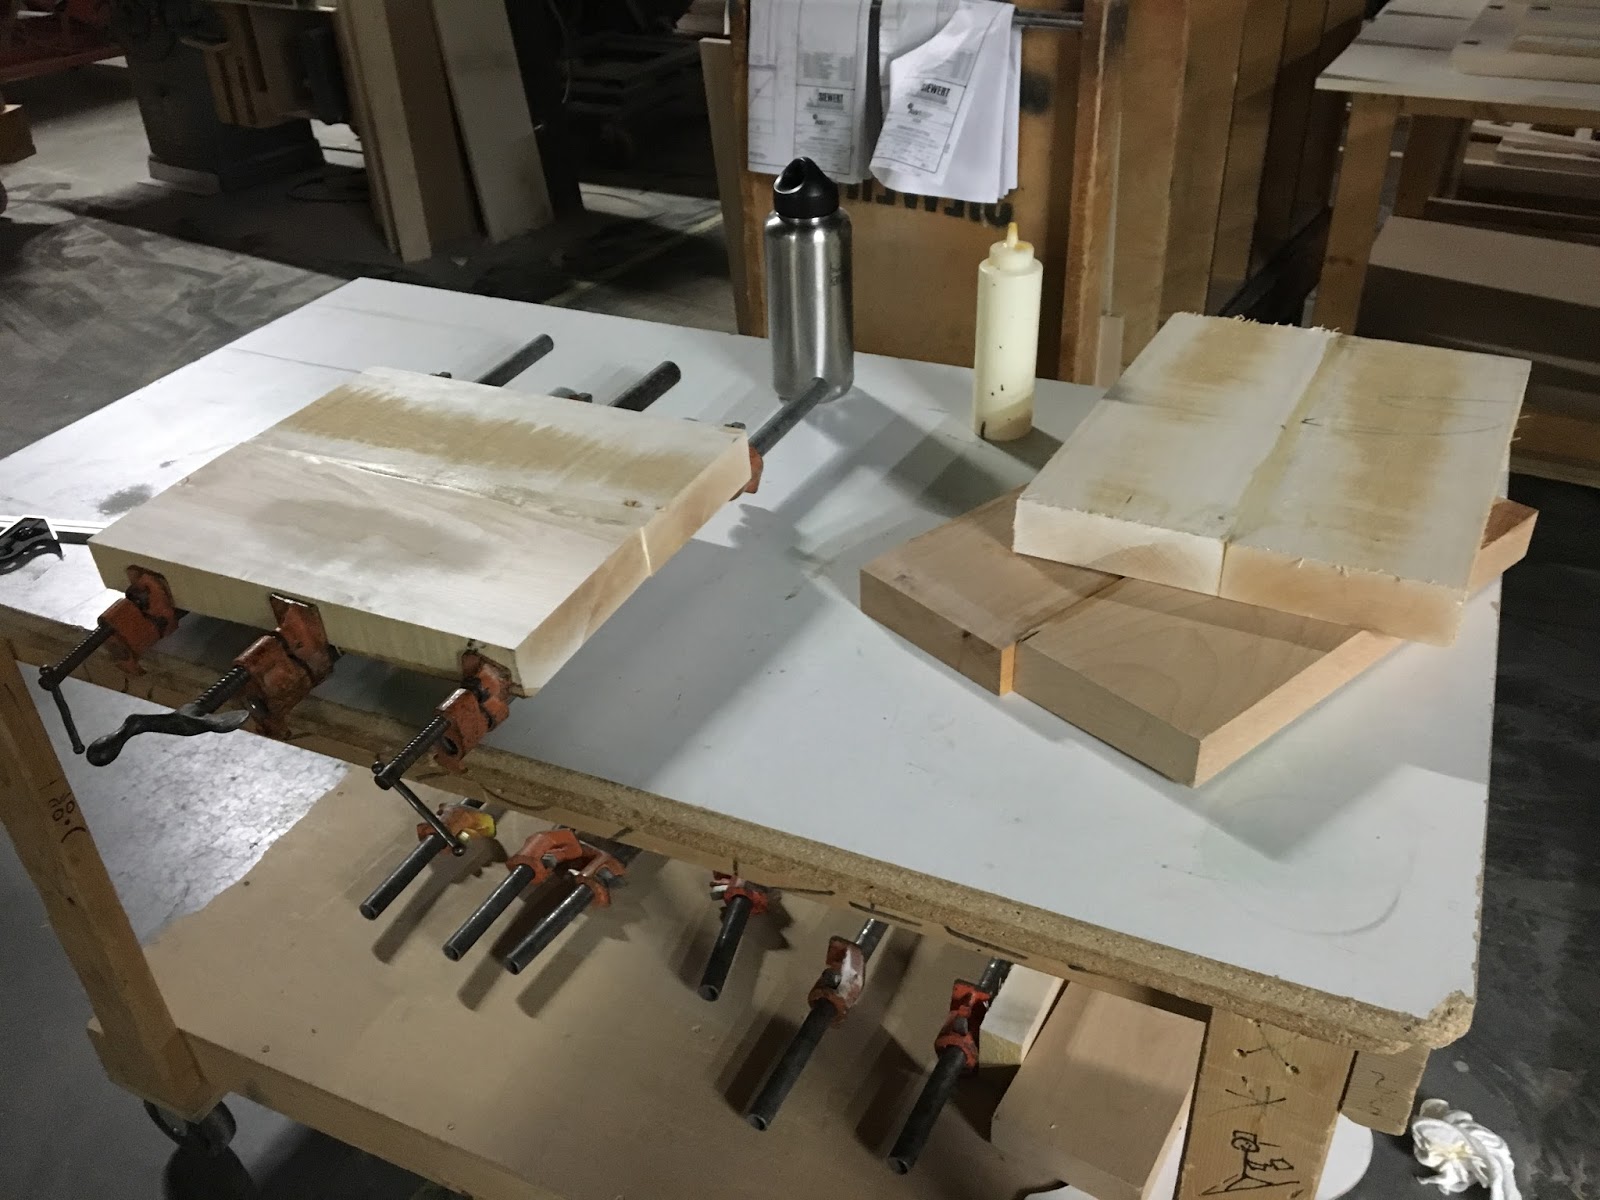
Gluing two pieces of wood together sounds like the easiest thing in the world. True joinery is an art unto itself though and it takes a deft hand to create a sound and perfect glue joint. I mostly still do a pretty good job of it, but it is challenging!
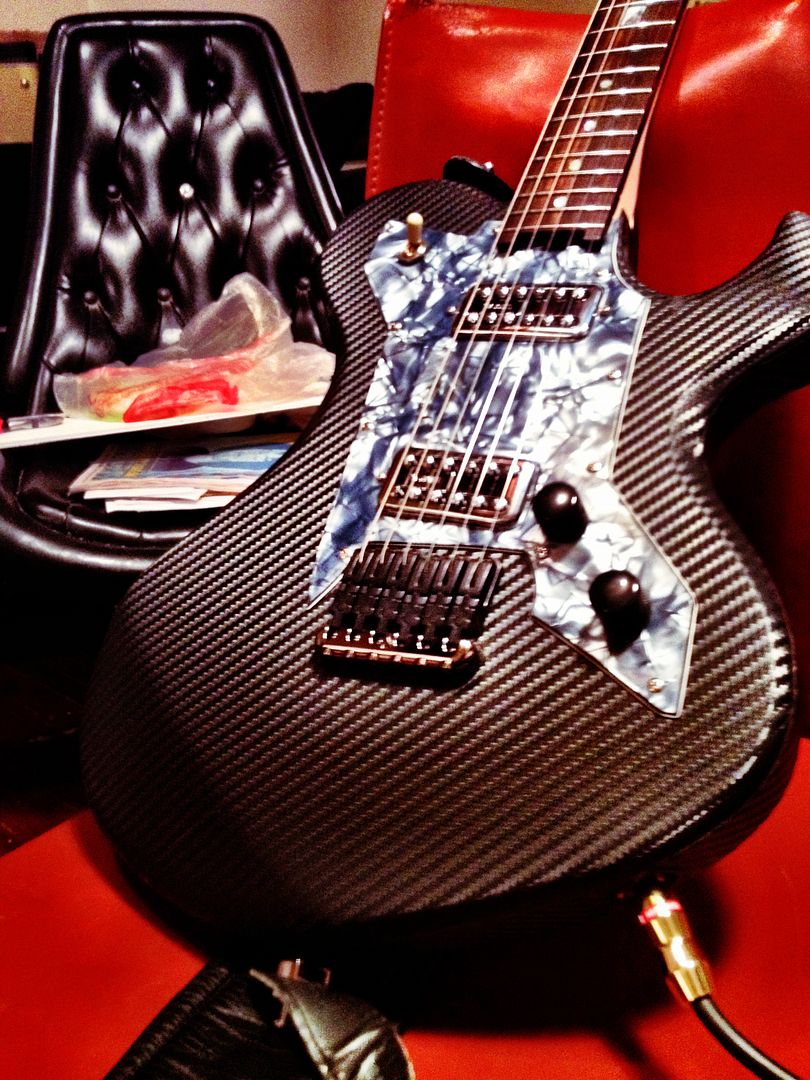
 This axe was my first commissioned piece. I designed it for my buddy Dave from the ground up with lots of insider details. We call it the DC Alpha. I was very happy with the way it turned out, but the time is here for the prototype to go into production.
 One cool thing about my job as a wood finisher in a Millwork shop is
that I have access to a bunch of big tools, and sometimes to the people
who run even bigger tools. So, long story short, I re-drew the
blueprint for this guitar with some nice changes included, and then
passed it off to one of our CAD drafters. He made a drawing that our
CNC guy plugged in to our machine and then seconds later. I had my new
body template in hand.
One cool thing about my job as a wood finisher in a Millwork shop is
that I have access to a bunch of big tools, and sometimes to the people
who run even bigger tools. So, long story short, I re-drew the
blueprint for this guitar with some nice changes included, and then
passed it off to one of our CAD drafters. He made a drawing that our
CNC guy plugged in to our machine and then seconds later. I had my new
body template in hand.
 It is not that easy of a thing to cut a shape on a band saw and then refine the edges until they are perfectly smooth without unsightly bumps or ridges. This template gives me that perfect outline to trace onto a body blank. I still cut the piece by hand, but then I have the template and a flush trim router bit to bring a slightly bumpy cut out into a duplicate of the original template. And this makes each guitar more consistent in the final product.
Here's a body blank, ready for the band saw.

And here's a herd of clones that are ready for the next step.
 There are three more of these in the back seat of my car. Next, I need to make hardware and pickup choices for each instrument. Then I will fabricate more templates that will allow me to route out the cavities for these additional parts. It's exciting to see these taking shape!
Along with different hardware options, I am going to produce a few different finishes that will add to the modern appeal of this design. The original idea for my DC Alpha design was inspired by the idea of a Telecaster meets The Jetsons. I definitely wanted to veer towards the future of guitars, not the past. Here is a sample of a finish I am working up. It involves laying up epoxy over some vintage polyester that came into my possession.

I love the classic shapes of the Stratocaster and Telecaster, but there are so many boutique builders out there remaking these tried and true guitars! It seems that every week, there is another new builder making copies of worn out guitars from the 50's and 60's. I respect the dedication and outright SKILL that it takes to mimic an old, distressed guitar, but Leo Fender made these guitars by innovating, not by copying. I say, find some inspiration, and then do something new with it.

One of the builders out there right now who is innovating and producing World Class guitars is Tom Anderson Guitarworks. I am fortunate enough to own one of his masterpieces and I am absolutely gobsmacked by the instrument! The fit and finish is the best I have ever seen from any maker, and I have played a lot of guitars in my day. One brilliant step forward is the Anderson neck joint. His Isosceles Trapezoid-shaped neck joint is so stable, that it only requires two screws, rather than the usual four found on most bolt-neck guitars. All this while remaining incredibly comfortable and offering unimpeded access to the upper frets. I am inspired! And I hope some of the craftsmanship invested in this instrument rubs off on me while I continue on this journey. Thanks for reading!
This is a pile of lumber that I picked up from a local favorite, Youngblood Lumber in NE Minneapolis. If you shop for "Guitar Wood" online, you will typically find individual pieces of lumber that are cut to size for the specific need, such as necks, electric bodies and so on. Typically, electric guitar bodies are made up of at least two joined pieces of wood and they are sold ready to go, and prices start around $50. But if you are willing to make a little sawdust and do some gluing, you can save a ton of cash! This stack, plus the following hunk of flamed maple cost me $60. That's enough wood for five guitars, one with a very nice looking curly top.
Gluing two pieces of wood together sounds like the easiest thing in the world. True joinery is an art unto itself though and it takes a deft hand to create a sound and perfect glue joint. I mostly still do a pretty good job of it, but it is challenging!
 This axe was my first commissioned piece. I designed it for my buddy Dave from the ground up with lots of insider details. We call it the DC Alpha. I was very happy with the way it turned out, but the time is here for the prototype to go into production.

Here's a body blank, ready for the band saw.

And here's a herd of clones that are ready for the next step.

Along with different hardware options, I am going to produce a few different finishes that will add to the modern appeal of this design. The original idea for my DC Alpha design was inspired by the idea of a Telecaster meets The Jetsons. I definitely wanted to veer towards the future of guitars, not the past. Here is a sample of a finish I am working up. It involves laying up epoxy over some vintage polyester that came into my possession.

I love the classic shapes of the Stratocaster and Telecaster, but there are so many boutique builders out there remaking these tried and true guitars! It seems that every week, there is another new builder making copies of worn out guitars from the 50's and 60's. I respect the dedication and outright SKILL that it takes to mimic an old, distressed guitar, but Leo Fender made these guitars by innovating, not by copying. I say, find some inspiration, and then do something new with it.

One of the builders out there right now who is innovating and producing World Class guitars is Tom Anderson Guitarworks. I am fortunate enough to own one of his masterpieces and I am absolutely gobsmacked by the instrument! The fit and finish is the best I have ever seen from any maker, and I have played a lot of guitars in my day. One brilliant step forward is the Anderson neck joint. His Isosceles Trapezoid-shaped neck joint is so stable, that it only requires two screws, rather than the usual four found on most bolt-neck guitars. All this while remaining incredibly comfortable and offering unimpeded access to the upper frets. I am inspired! And I hope some of the craftsmanship invested in this instrument rubs off on me while I continue on this journey. Thanks for reading!


