
As I peer through panes of plate glass, my gaze is fixed on the heaps of snow in Loring Park. The rapidly shrinking heaps of snow. And the expanding patches of yellow-green grass that will soon dominate the landscape. Good golly, Miss Molly... I am so ready for this. It was a bit demoralizing to road trip to the Rocky Mountains and find less snow on the ground at 8,500 feet above sea level than we have littering the average boulevard in Minneapolis. That said, the trip did remind me of some fantastic things that I dig in my city. Wedge Co-op, I love you. Hardwood trees visible from horizon to horizon, you are beautiful. My sweet, tone-full guitar collection, I will never leave you again. Thanks for waiting for me. Though the Rockies are incredible, Colorado just isn't home anymore.

The eastern slope of the Rockies aka The Front Range.
Ok! It's about time to set the neck on this puppy. I am trying something different this time and that is, finishing the neck and body separately, like a lot of boutique builders do. Once both pieces are finished on their own, I will glue them together. I've chosen to use a tung oil finish on the neck and shellac via French polish on the body. The tung oil finish feels great in the hand. It penetrates and seals the wood without building much film so you can feel wood. It has an attractive low sheen and it feels smooth and inviting in the hand. Shellac yields a peerless, glowing beauty that is perfect to enhance the figure and depth, aka chatoyance, that is inherent to Koa. Plus, you can get this level of beauty with a very thin coating, which is a great boon to getting maximum tone out of the instrument. A thick finish on an acoustic instrument is like putting a blanket over the sound. Why would you?
Before finishing, the wood surface itself has to be perfected. If you put finish over flawed work, the defects are magnified in a big way. Instead of sandpaper, I used my thinnest cabinet scrapper to prepare the wood surface for finishing. Sanding actually pushes dust into the pores of the wood. Shaving with the cabinet scrapper leaves a smooth surface that shows maximum clarity of grain after finishing. I followed the scrapping with two grain-raising processes and a nice rubdown with pieces of "horsetail". This is a plant found near water. In other words, all over Minnesota. It has some very fine but stiff ridges that de-whisker the raised grain and leave the wood ready for coating.
This finishing/assembly approach necessitates locating the bridge and fingerboard on the body prior to gluing, which takes some extra care and time. Regular old low-tack painters tape is used to cover the areas that need to stay bare. These bare spots are necessary for quality glue joints. After the finish is applied, the tape is pulled off to reveal clean wood ready to be glued.
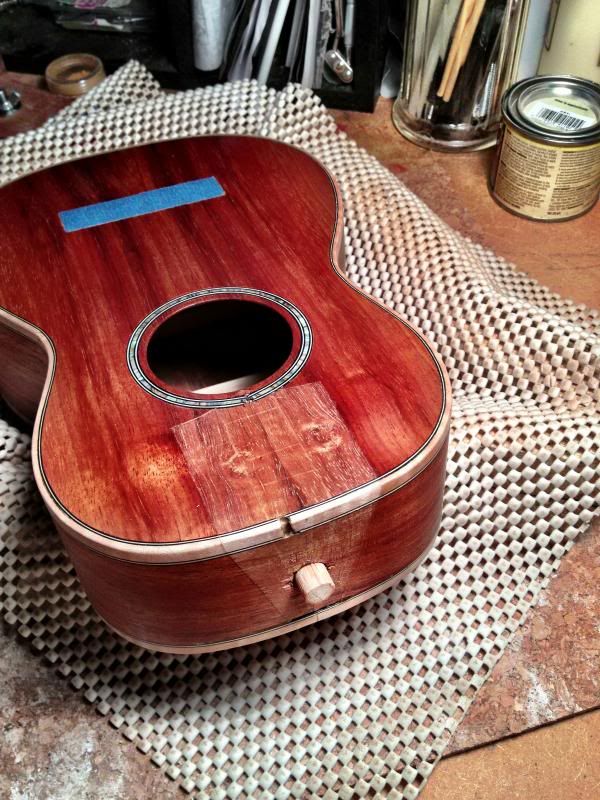
This shot shows the body after finishing. Note that the fingerboard overhang area in the upper bout has had the tape pulled off. The bridge location is still covered. The neck joint area is also absent of any finish, which would interfere with adhesion.
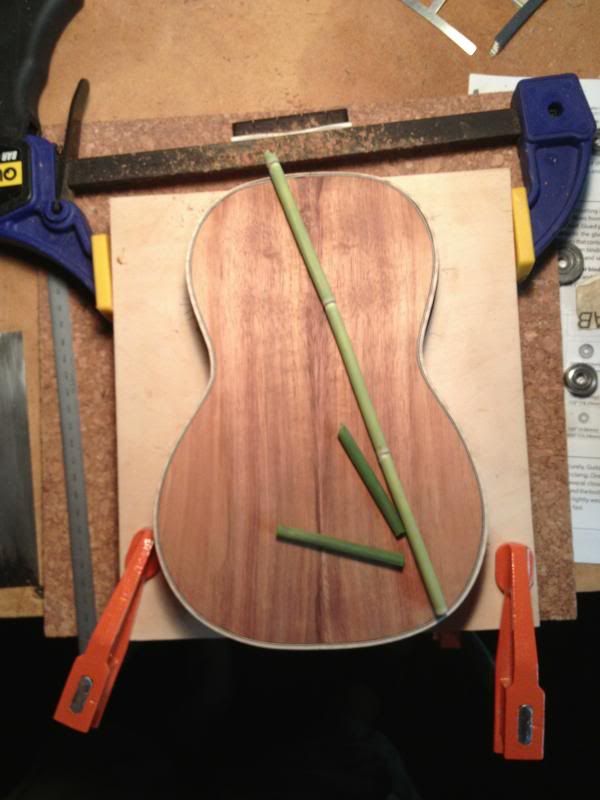
The design of this kit is somewhat flawed in that the neck/body joint uses a dowel to add sturdiness. Unfortunately, the pre-drilled location is not quite in the proper place. I miraculously re-located and drilled a larger hole for a bigger dowel. After double and triple-checking the fit, I tested my gluing approach with dry clamping and then went for the money.
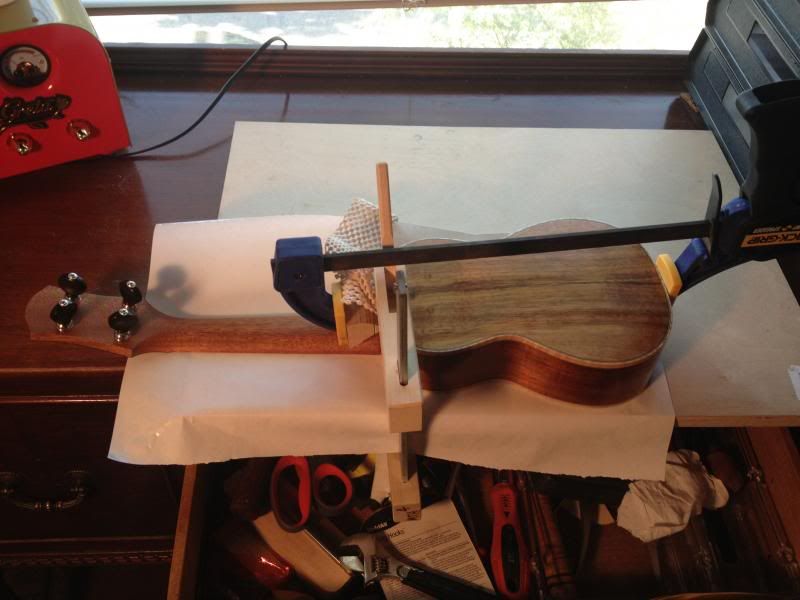
The fingerboard adds a lot to the overall look and it becomes obvious that I've got a one-piecer on my hands. Now to get that bridge glued on... My local Ace hardware had some great C-clamps that were the perfect size for this tiny piece, and they were nice and cheap. That's what I'm talkin' about!
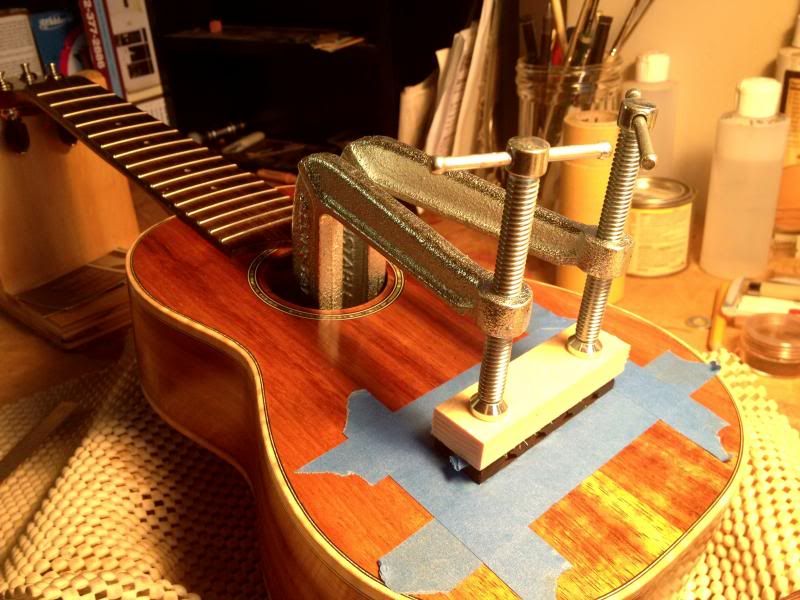
Before gluing the bridge, I removed the tape that kept the wood bare, and then corraled that bare area with more tape. This creates a bit of a safety that prevents creeping of the piece while the glue sets up.
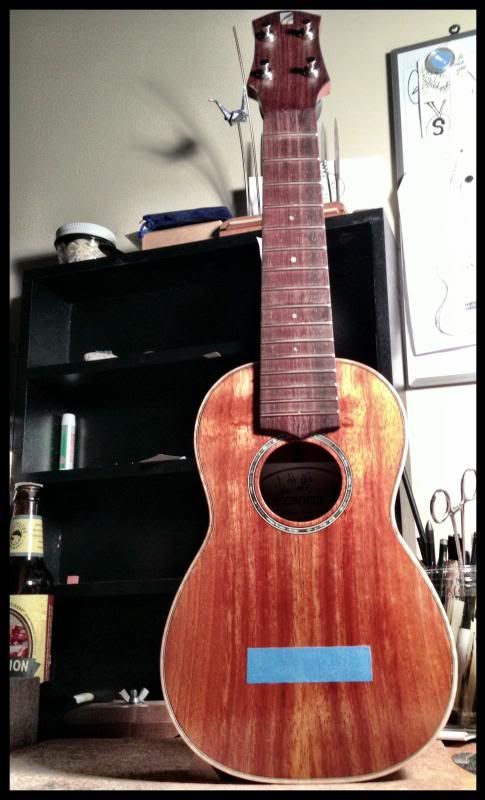
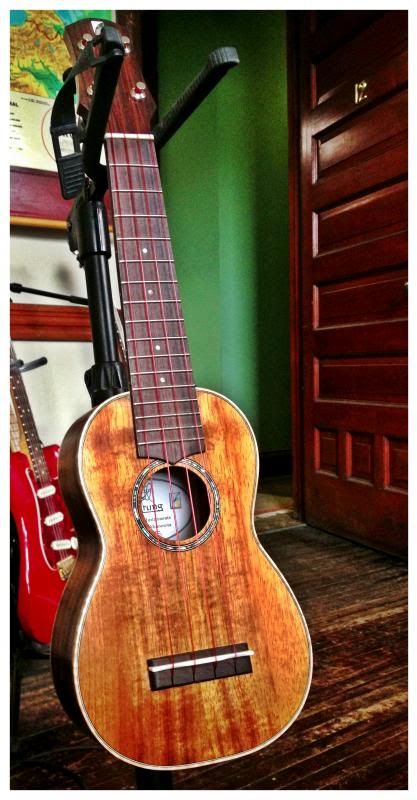
I let the piece sit overnight and went shopping for strings. My friend Chad at Encore Music set me up with a cool set of red ukulele strings. These are the ones you want! The next day I strung her up and spent a great while just grinning. She looks and sounds great.
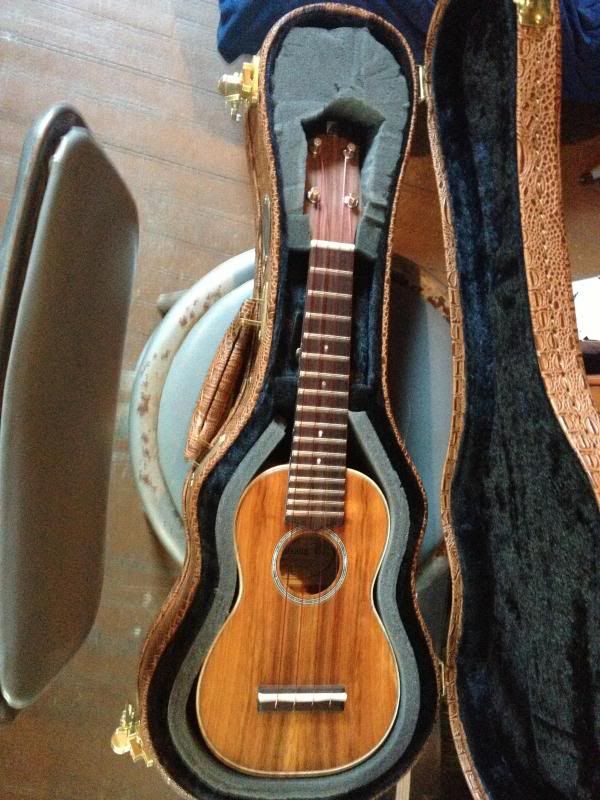
Almost finished! Turns out that I bought the wrong size case and needed to improvise. My idea was to make the case convertible, from soprano to concert-size (two different scales of uke...) and back again. I created some foam blocks that fit the smaller size instrument and covered them with some nice crushed velvet. This modification yielded a nice snug fit in the case. The blocks can be pulled out to fit a larger concert uke whenever you like.
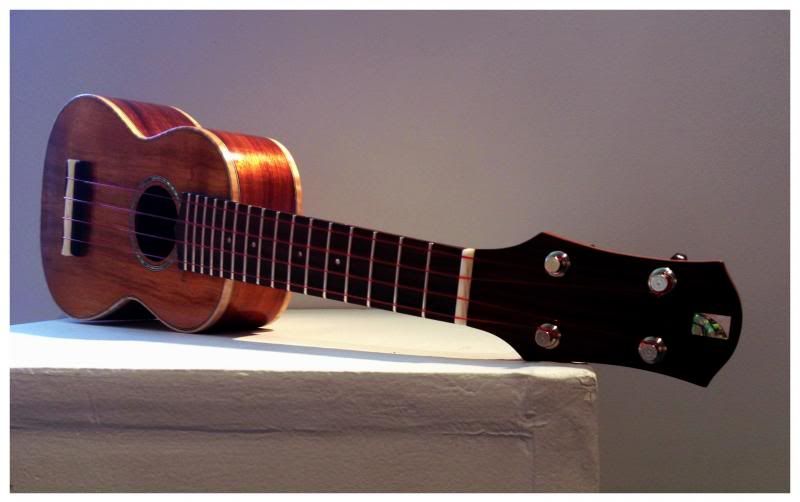
This was a lot of fun to build. It's fun to play and a gorgeous piece of work to boot. Next time, I'll get a song video posted and maybe a few highlight photos too. Thanks for reading!

The eastern slope of the Rockies aka The Front Range.
Ok! It's about time to set the neck on this puppy. I am trying something different this time and that is, finishing the neck and body separately, like a lot of boutique builders do. Once both pieces are finished on their own, I will glue them together. I've chosen to use a tung oil finish on the neck and shellac via French polish on the body. The tung oil finish feels great in the hand. It penetrates and seals the wood without building much film so you can feel wood. It has an attractive low sheen and it feels smooth and inviting in the hand. Shellac yields a peerless, glowing beauty that is perfect to enhance the figure and depth, aka chatoyance, that is inherent to Koa. Plus, you can get this level of beauty with a very thin coating, which is a great boon to getting maximum tone out of the instrument. A thick finish on an acoustic instrument is like putting a blanket over the sound. Why would you?

Before finishing, the wood surface itself has to be perfected. If you put finish over flawed work, the defects are magnified in a big way. Instead of sandpaper, I used my thinnest cabinet scrapper to prepare the wood surface for finishing. Sanding actually pushes dust into the pores of the wood. Shaving with the cabinet scrapper leaves a smooth surface that shows maximum clarity of grain after finishing. I followed the scrapping with two grain-raising processes and a nice rubdown with pieces of "horsetail". This is a plant found near water. In other words, all over Minnesota. It has some very fine but stiff ridges that de-whisker the raised grain and leave the wood ready for coating.
This finishing/assembly approach necessitates locating the bridge and fingerboard on the body prior to gluing, which takes some extra care and time. Regular old low-tack painters tape is used to cover the areas that need to stay bare. These bare spots are necessary for quality glue joints. After the finish is applied, the tape is pulled off to reveal clean wood ready to be glued.

This shot shows the body after finishing. Note that the fingerboard overhang area in the upper bout has had the tape pulled off. The bridge location is still covered. The neck joint area is also absent of any finish, which would interfere with adhesion.
The design of this kit is somewhat flawed in that the neck/body joint uses a dowel to add sturdiness. Unfortunately, the pre-drilled location is not quite in the proper place. I miraculously re-located and drilled a larger hole for a bigger dowel. After double and triple-checking the fit, I tested my gluing approach with dry clamping and then went for the money.


The fingerboard adds a lot to the overall look and it becomes obvious that I've got a one-piecer on my hands. Now to get that bridge glued on... My local Ace hardware had some great C-clamps that were the perfect size for this tiny piece, and they were nice and cheap. That's what I'm talkin' about!

Before gluing the bridge, I removed the tape that kept the wood bare, and then corraled that bare area with more tape. This creates a bit of a safety that prevents creeping of the piece while the glue sets up.
I let the piece sit overnight and went shopping for strings. My friend Chad at Encore Music set me up with a cool set of red ukulele strings. These are the ones you want! The next day I strung her up and spent a great while just grinning. She looks and sounds great.

Almost finished! Turns out that I bought the wrong size case and needed to improvise. My idea was to make the case convertible, from soprano to concert-size (two different scales of uke...) and back again. I created some foam blocks that fit the smaller size instrument and covered them with some nice crushed velvet. This modification yielded a nice snug fit in the case. The blocks can be pulled out to fit a larger concert uke whenever you like.


This was a lot of fun to build. It's fun to play and a gorgeous piece of work to boot. Next time, I'll get a song video posted and maybe a few highlight photos too. Thanks for reading!
No comments:
Post a Comment