
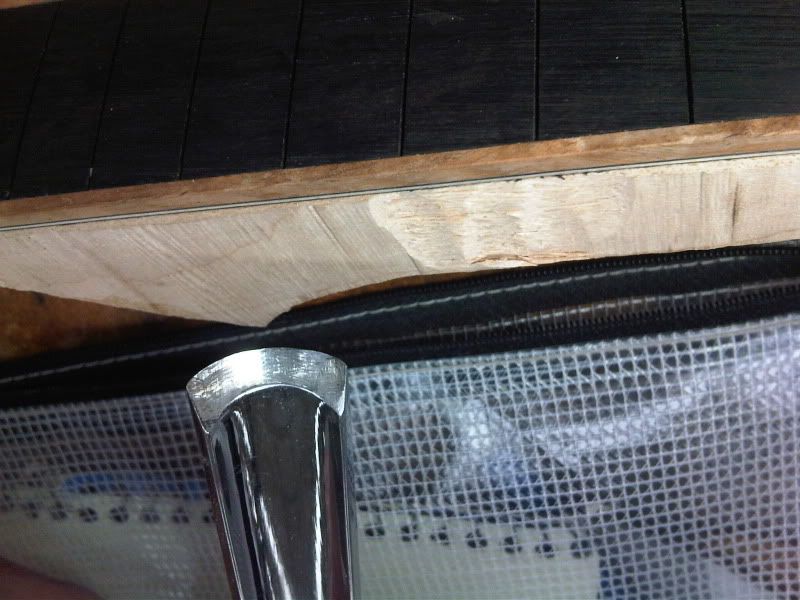
When I was a much younger fellow, my brother Gordon was a fired up volunteer at KBDI TV-12 in Broomfield, Colorado. KBDI was public tv and pretty hip in those days. I witnessed my first Devo video (Whip It?) and got my first taste of Monty Python on channel 12. One day Gordon came home with a stack of paper 3D fold up Xeroxes. These are a riff on the art of paper folding (aka Origami). Except, scissors and glue (or tape) are allowed and step by step instructions are printed right on the paper.
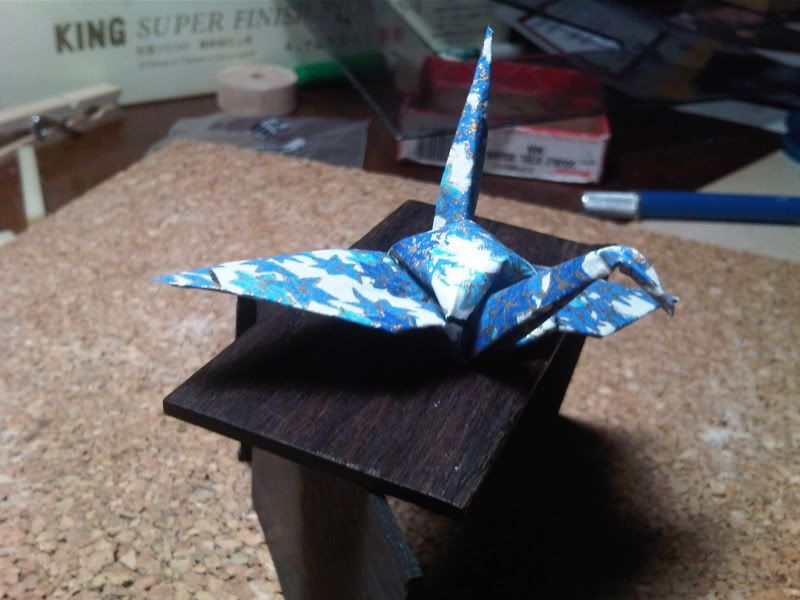
I had already been turned on to origami by a Japanese champion. She taught me to fold the crane. I was a young kid and it stuck in my brain. The fold-up that Gordon had brought home let you create a 3D paper rendering of Dr. Who's robot dog K-9. Something about this process seemed a little more challenging and I was into it. Gordon had already finished one, and naturally that made it an instantly worthwhile pursuit.
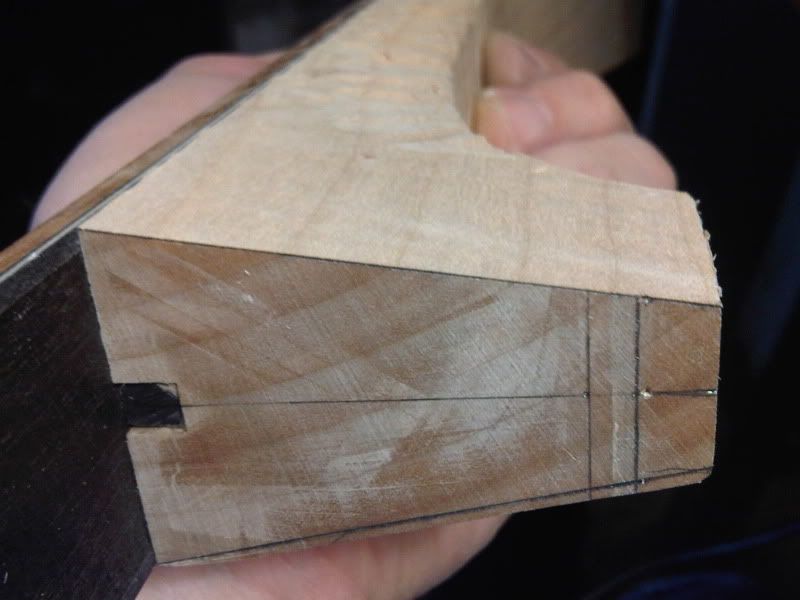
The oft-repeated tab x into slot x step from those instructions is my current goal. Instead of just cutting out tab A from a sheet of paper, I have to carve it by hand from wood. And then I'll create slot A to perfectly fit the tab.
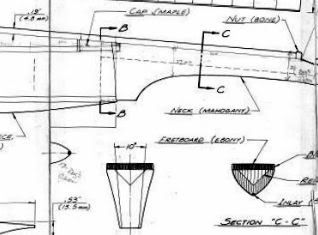
We take some dimensions for the heel, which is the tab I've been talking about, from this drawering. It is a 1:1 scale, so we can lay our $40 Starrett metric ruler down on it and take an exact measurement at any location. These dimensions are transferred to the heel of the neck we are building, paying strict attention to existing center lines.
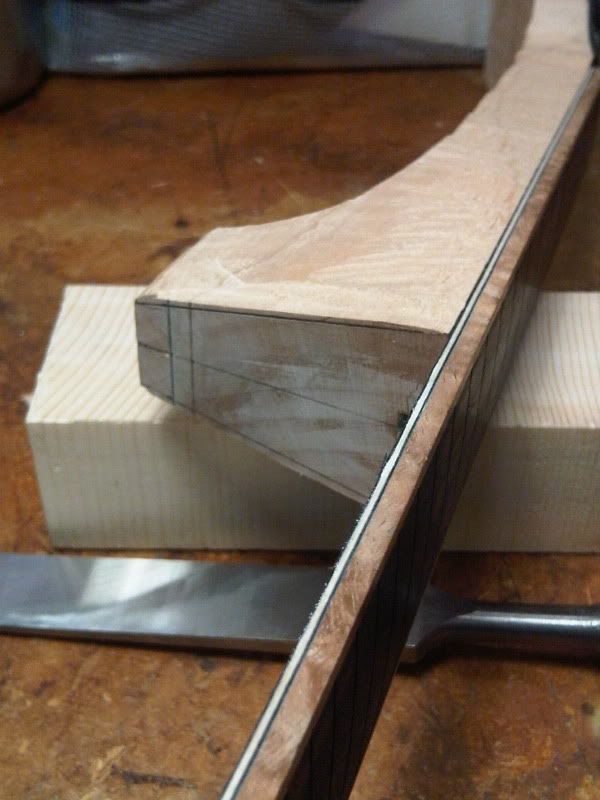
You'll notice some extra wood outside of the lines. That is removed with the block plane. This tool can return very precise, flat cuts if properly employed. In order to make a good clean cut to the heel area, the neck has to be pared down a bit to allow the plane an unimpeded stroke. For this, I take up the incannel gouge.
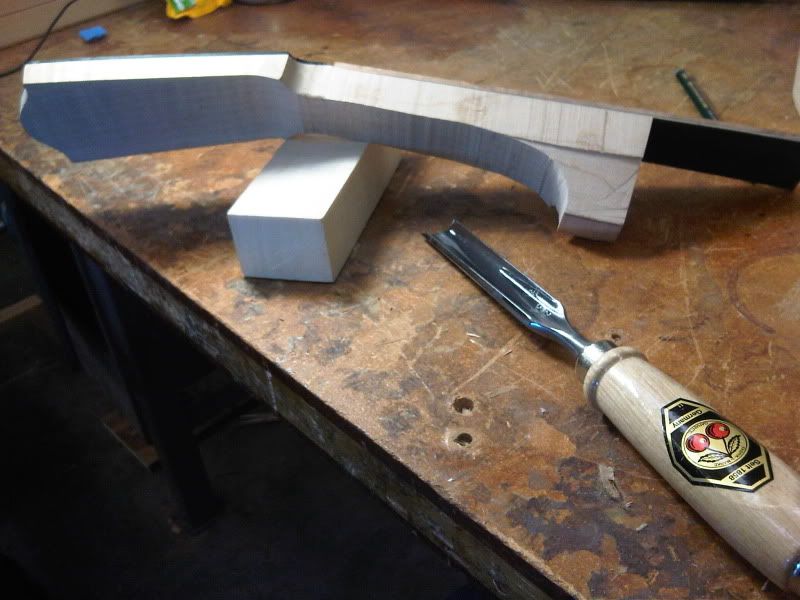
I cut away the corners from the back of the neck, yielding a rough trapezoidal shape. The plane can now travel most of the length of the neck, clearing all of the heel. Now, I just whack away until I get down to the line. Gotta make sure the cut stays flat in both directions though...
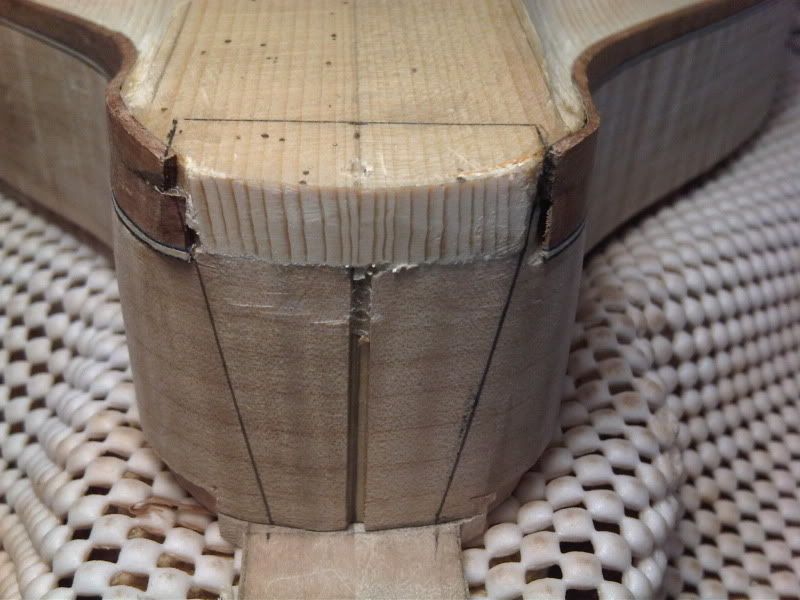
One side down, one to go. Then I will rough trim the length of the heel. There is a thing called the "button" that is part of the mando box. The button location is represented on the heel by the two vertical lines. (To the right of them, excess wood, cushion for carving and fitting.) It acts as a sort of landing pad for the heel as the neck is set. The exact length of the heel is determined when the neck becomes properly set. Later, the two pieces are carved together in an ornamental shape
Once the heel is satisfactorily shaped in all aspects, no more cuts will be made to it other than shaving the length of the heel to fit perfectly when the desired neck height is achieved. A number of tricky things must be made to happen well, and simultaneously. "It's like trying to hit a bullet with a smaller bullet, whilst blindfolded, riding a horse."
Ok. Now that "Tab A" is finished, I transfer the measurements from it to the neck location on the box. The center lines are king here and that 40 dollar ruler really helps.
After the lines are drawn to our liking, we take a sharp carving knife and score along them. Several light passes gives a safer and more accurate cut. The scored areas help prevent tear-out as we chisel out the neck pocket.
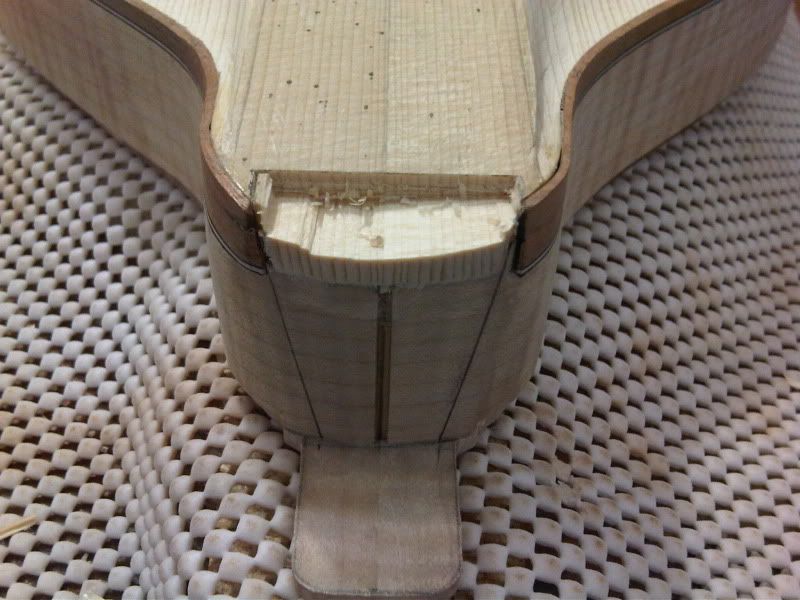
We carve away layer after layer, taking it slow and making sure the pocket stays square. I took some time a while back to sharpen my chisels while I waited for some glue to dry. The payoff is now as the process of digging this hole goes by quickly. After a little cleanup, this mortise will be ready to receive the tenon.
This first fitting is exciting. The neck extension height is way off, as you can see, but from a certain angle, it looks like the real thing. I'm pumped!

My buddy Andy said that once this job was finished, everything left was all cake. Come back next time and have a slice.

I had already been turned on to origami by a Japanese champion. She taught me to fold the crane. I was a young kid and it stuck in my brain. The fold-up that Gordon had brought home let you create a 3D paper rendering of Dr. Who's robot dog K-9. Something about this process seemed a little more challenging and I was into it. Gordon had already finished one, and naturally that made it an instantly worthwhile pursuit.
The oft-repeated tab x into slot x step from those instructions is my current goal. Instead of just cutting out tab A from a sheet of paper, I have to carve it by hand from wood. And then I'll create slot A to perfectly fit the tab.

We take some dimensions for the heel, which is the tab I've been talking about, from this drawering. It is a 1:1 scale, so we can lay our $40 Starrett metric ruler down on it and take an exact measurement at any location. These dimensions are transferred to the heel of the neck we are building, paying strict attention to existing center lines.

You'll notice some extra wood outside of the lines. That is removed with the block plane. This tool can return very precise, flat cuts if properly employed. In order to make a good clean cut to the heel area, the neck has to be pared down a bit to allow the plane an unimpeded stroke. For this, I take up the incannel gouge.


I cut away the corners from the back of the neck, yielding a rough trapezoidal shape. The plane can now travel most of the length of the neck, clearing all of the heel. Now, I just whack away until I get down to the line. Gotta make sure the cut stays flat in both directions though...

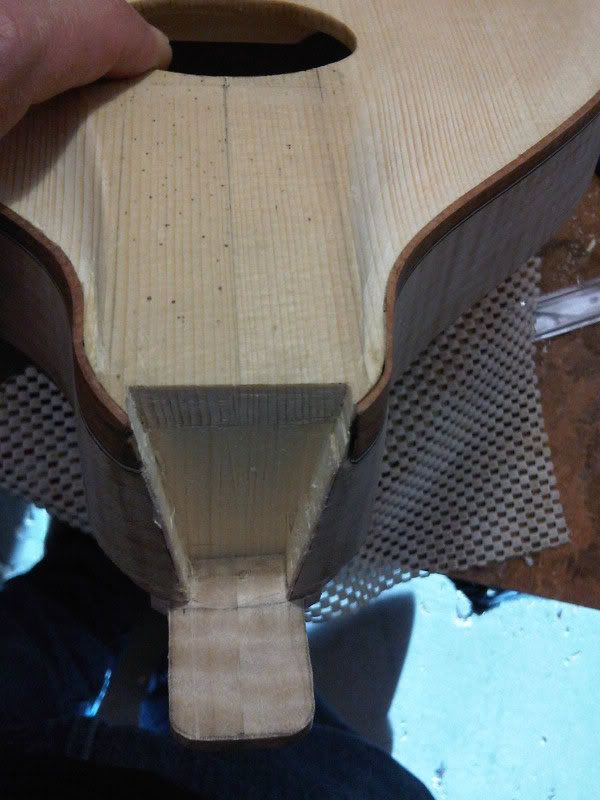
One side down, one to go. Then I will rough trim the length of the heel. There is a thing called the "button" that is part of the mando box. The button location is represented on the heel by the two vertical lines. (To the right of them, excess wood, cushion for carving and fitting.) It acts as a sort of landing pad for the heel as the neck is set. The exact length of the heel is determined when the neck becomes properly set. Later, the two pieces are carved together in an ornamental shape
Once the heel is satisfactorily shaped in all aspects, no more cuts will be made to it other than shaving the length of the heel to fit perfectly when the desired neck height is achieved. A number of tricky things must be made to happen well, and simultaneously. "It's like trying to hit a bullet with a smaller bullet, whilst blindfolded, riding a horse."
Ok. Now that "Tab A" is finished, I transfer the measurements from it to the neck location on the box. The center lines are king here and that 40 dollar ruler really helps.

After the lines are drawn to our liking, we take a sharp carving knife and score along them. Several light passes gives a safer and more accurate cut. The scored areas help prevent tear-out as we chisel out the neck pocket.

We carve away layer after layer, taking it slow and making sure the pocket stays square. I took some time a while back to sharpen my chisels while I waited for some glue to dry. The payoff is now as the process of digging this hole goes by quickly. After a little cleanup, this mortise will be ready to receive the tenon.

This first fitting is exciting. The neck extension height is way off, as you can see, but from a certain angle, it looks like the real thing. I'm pumped!

My buddy Andy said that once this job was finished, everything left was all cake. Come back next time and have a slice.
Your posting just gets better.
ReplyDeleteron